So you’ve been fitted and chosen your make and model of shoes, and brought them home. But there’s a lot you need to do to them first in order to be able to dance in them! Pointe shoes come as they are, so you’ll need to sew your ribbons on, possibly elastic too, and darn the platform. Knowing correct placement and methods can be confusing, so here’s the best way to get them fit for class!
RIBBONS.
Pointe Shoe ribbon should be 1 inch wide, and you’ll need around 2.5 meters in length. Cut the ribbon length in half just once, so you’re left with 2 1.25 meter pieces and set aside. Next take the shoe and fold the back seam down flat into the shoe, and you should be left with a triangle shape from the sides. Take a pencil, insert into the folded seam and score along the crease to the outer edge on both sides. When you lift the heel piece back up, you’ll find to diagonal lines on the inside of the shoe. These are your guides on where to sew your ribbons.
Take one piece of ribbon, find the centre and pin it on the inside of the seam at the heel, BELOW your pencil line, and follow along until you reach the end of the shoe, like this; 
Begin to sew from the centre seam, all the way along the ribbon until you reach the centre seam again, and repeat on the other side. I like to double up on my cotton and use a running stitch which keeps it nice and neat and continuous. When you’ve finished and turned the heel back inwards, the ribbon should lie almost across the back of the sole, so effectively your heel will be standing on the centre of the ribbon. This provides extra strength to the shoe and ribbons themselves, which in turn should help you with your technique.
ELSATICS.
Depending on thhe fitting and requirements of your shoe, you may, like I, need to sew elsactic onto the back on the shoe to prevent the heel slipping off the foot when dancing en pointe. Please check with your fitter if you are experiencing problems, as this may be able to be rectified by using a different model shoe. If you need elastic, then you need what’s called ‘invisible’ elastic. It’s 1 inch wide again, and less visible and bulky than other types.
With your shoe on your foot, measure from the heel, around your ankle and back to the heel on the other side. Cut the elastic to this length. Pin the ends of the elastic to the seam running down the back of the heel piece. Sew in place on both sides. This will mean the elastic loop sits inside the shoe, like this; 
This enables your ankle to not be too restricted, but provides the support the heel piece needs.
DARNING.
There are so many different techniques to darn your shoes, it’s a mine field for first timers. What I’ll say is that many professionals use techniques and materials of their own preference. As a rule, if you’re a student, the way I will show you is the best all round for your needs. You’ll need some pink darning cotton, it’s much thicker than normal cotton thread, and a darning or curved needle. I start in the centre of the platform, and using a chain stitch, start working my way around, in a spiral, until I’ve darned the whole of the platform of the shoe, and just underneath until you reach the tip edge of the outer sole.
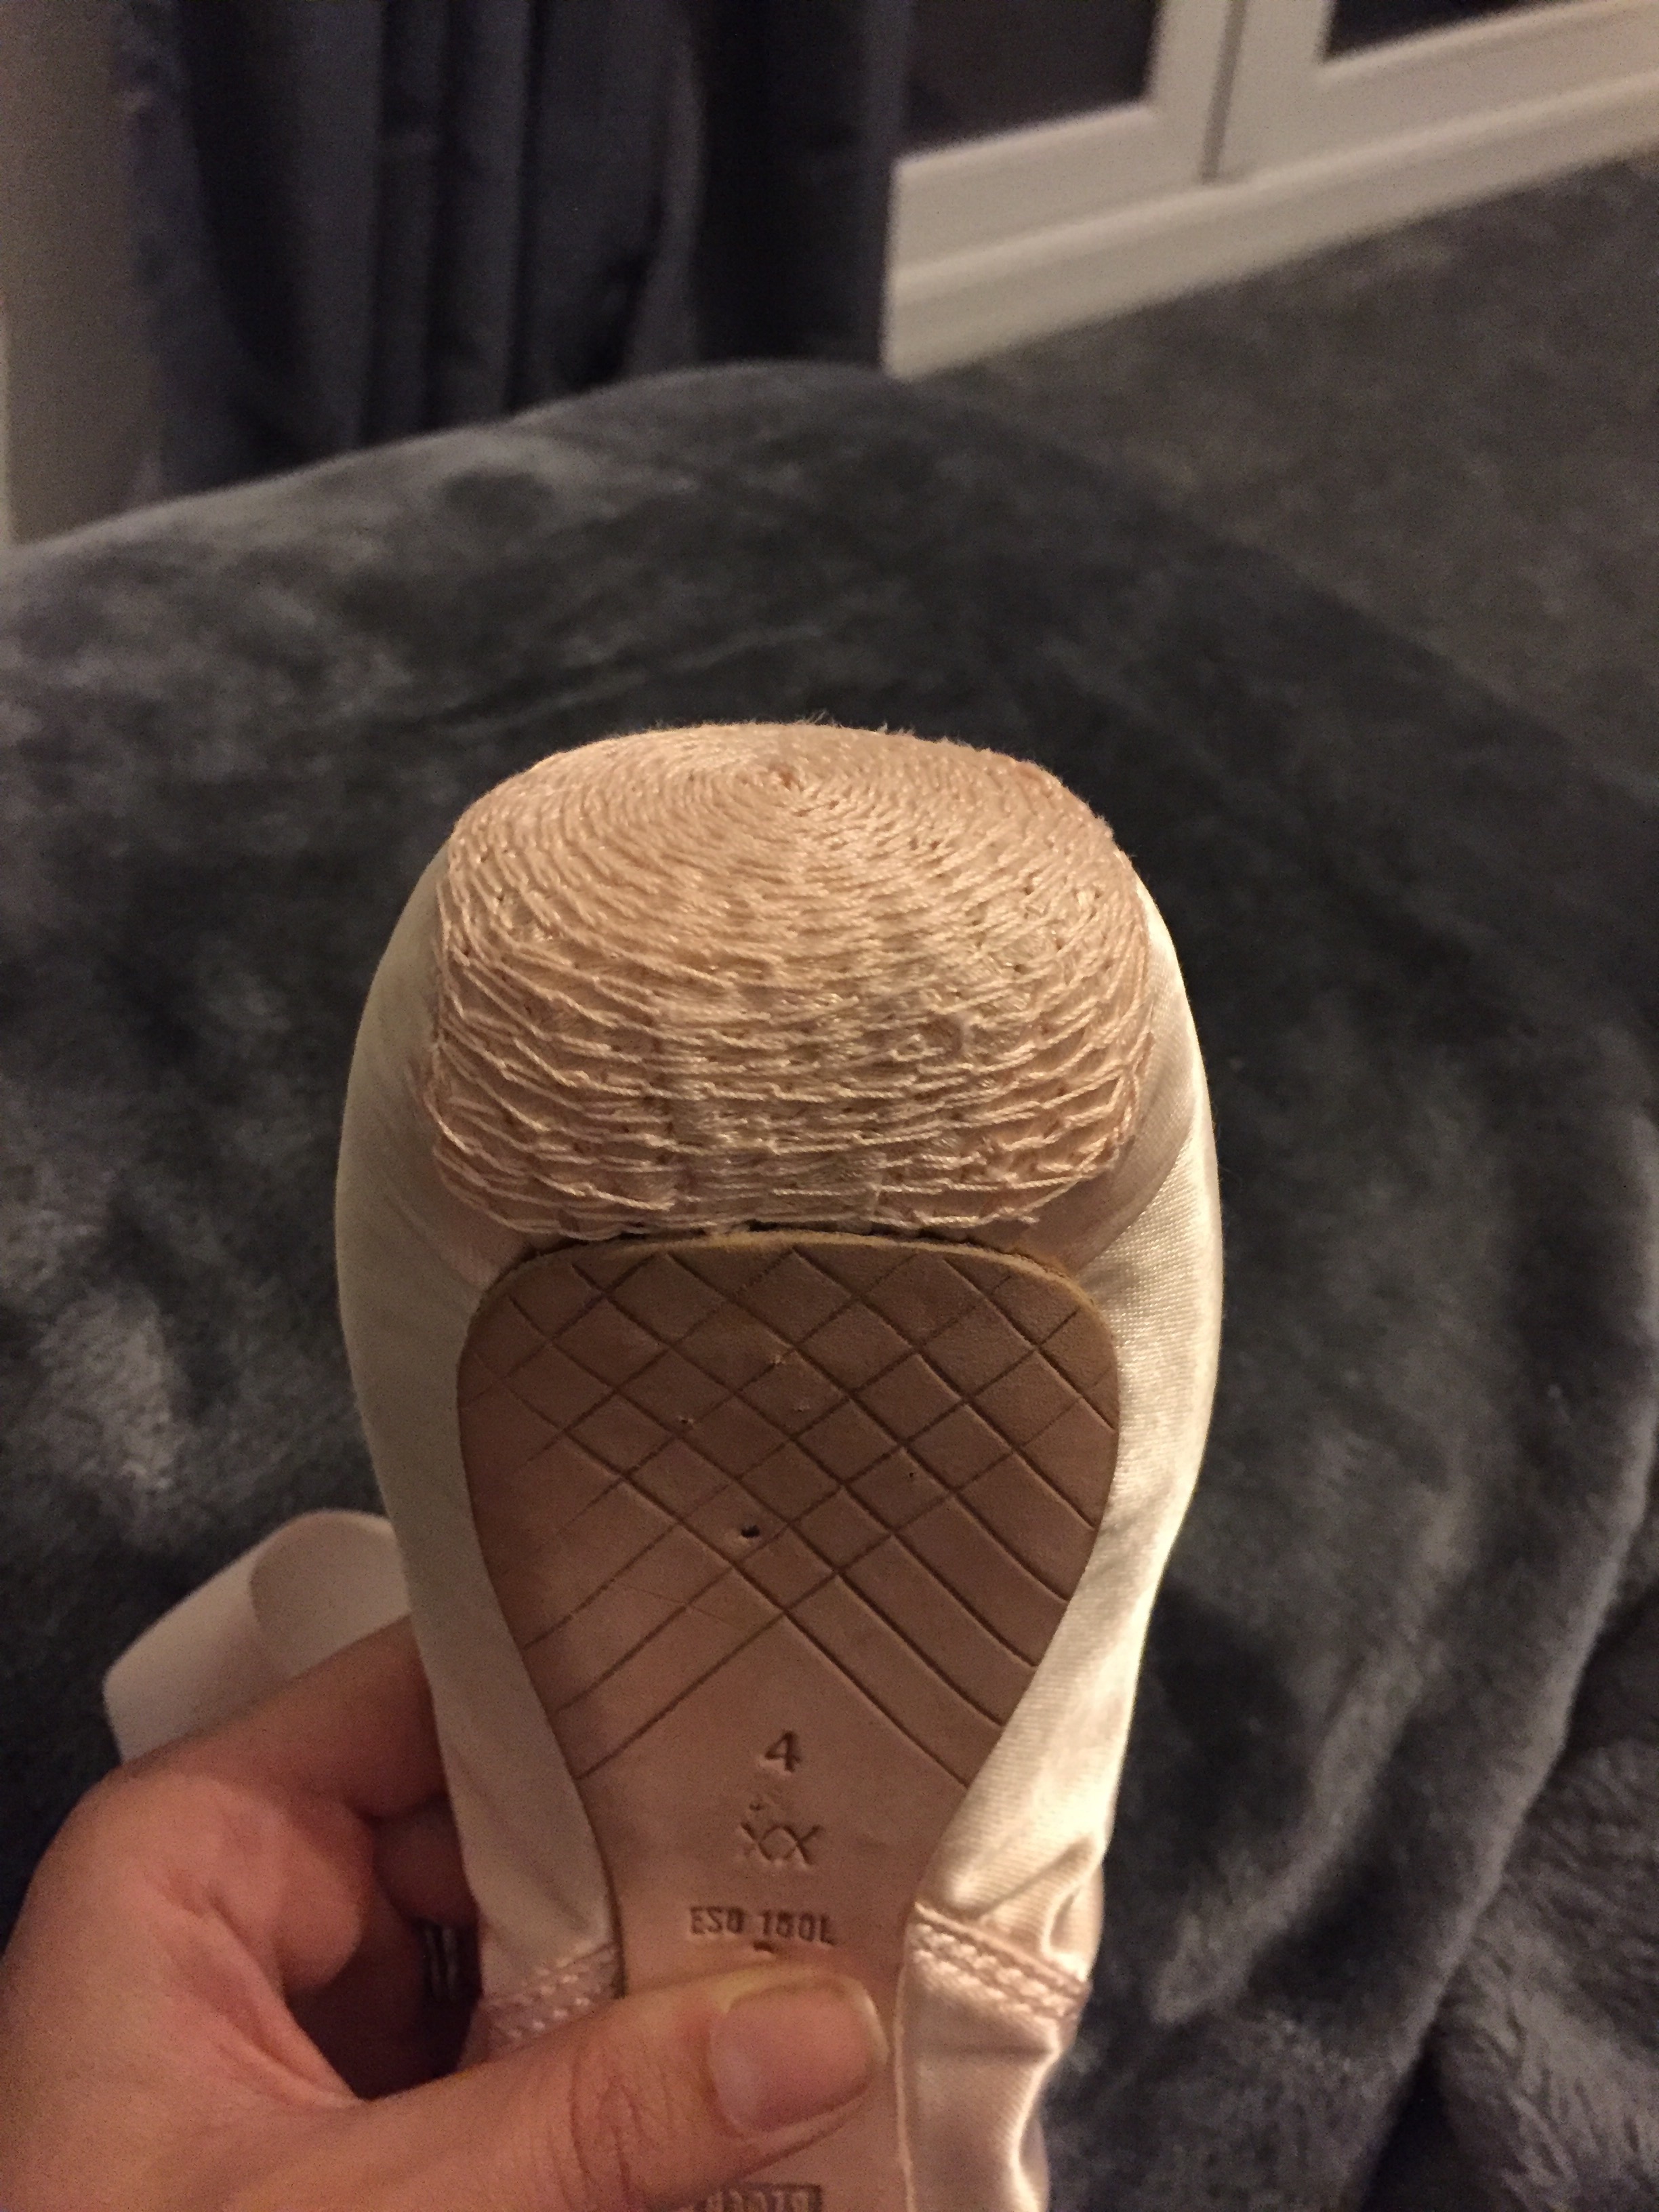
DARNING is quite labour instensive and hard work in your fingers. You can now buy suede pieces themat are glued onto the area, however for me, DARNING is part of the discipline of dancing en pointe, and is such a beautiful thing to look at!
SOFTENING
Before wearing your pointe shoes in class for the first time, you may want to start to soften your pointe shoes a little. PLEASE PLEASE PLEASE do not; use a hammer, a door frame, stand on them, bend them. You will just destroy your shoes and possibly render them unfit for use. They may no longer offer the support you need, then you’ll be paying for a new pair pretty quickly! Professionals do this as they need several pairs of shoes for a single performance, which they need them to be broken in straight away. When you’re a stundent, your feet need to do this alone, that’s where they will build their strength from. But you can help the process. Wear them around the house like slippers. Out then on, put socks over the top to stop the satin getting dirty, and keep them on. It’s the heat and moisture from your feet that will start to soften and begin to break down the paste layers in the box, making them mould to your foot. Then they will be a bit less stiff for class when you can really start to work them during exercises.
I really think there’s something so special about preparing pointe shoes for use. It almost builds a bond between you and your shoe, you will literally have put blood sweat and tears into these torture chambers, but they are part of your craft, and all the sewing signifies the hard work has already begun.
Head on over to my Instagram page @ballerina_mum where I’ll be posting a couple of videos and ribbons and darning to give you extra clarity if you need it.
Happy sewing!
Alicia 💗

Love this series! It’s always interesting to see how other dancers prepare their shoes 😊
LikeLiked by 1 person
Love this!!
http://www.dancingkatie.wordpress.com
LikeLike
Thank you lovely x
LikeLike